
Introduction
Whilst this will be seen by many as a security risk with email being the most common way companies recieve ransomware links and email viruses, There are times when a catch-all address may be useful, for instance when moving from another email provider to M365 (Exchange Online), to ensure that no email addresses have been missed. I would always recommend in such cases creating a “Catch All” Mailbox, setting the Transport Rule to force the SCL to 9 so that these emails get quarantined and reviewed by IT, prior to releasing them to a mailbox / Forwarding to the relevant user.
On the security risk aspect, Whilst it may have been the case in times gone by where spammers would try variations on email addresses, recieving “553 Mailbox doesn’t exist” until they found one that existed, These days with the amount of hacks of companies such as Linked In, Facebook and various job sites the amount of real email addresses in the wild, It’s unlikely that this tactic is still being used widely by malicious actors / spammers and so isn’t of any real concern these days.
It’s worth pointing out at this stage, these steps /may/ only work if you’re using Microsoft 365 on it’s own, Or with Defender for O365. If you’re using Mimecast, Proofpoint or another mail protection system you may need to make additional changes, or it may just not work full stop.
Creating a Distribution Group containing all mail objects.
To create a catchall in Exchange/M365 we’ll need to start with a distribution group that contains all mail items.Lets start by creating a dynamic (automatically updating) distribution group containing all mail objects (Contacts, Distribution groups, Mailboxes) and then later on we’ll set the Transport Rule to redirect all emails not destined to these users to be redirected to another mailbox.
Start by going to your ECP, In my case Exchange admin center From here, expand Recipients, and then Groups.
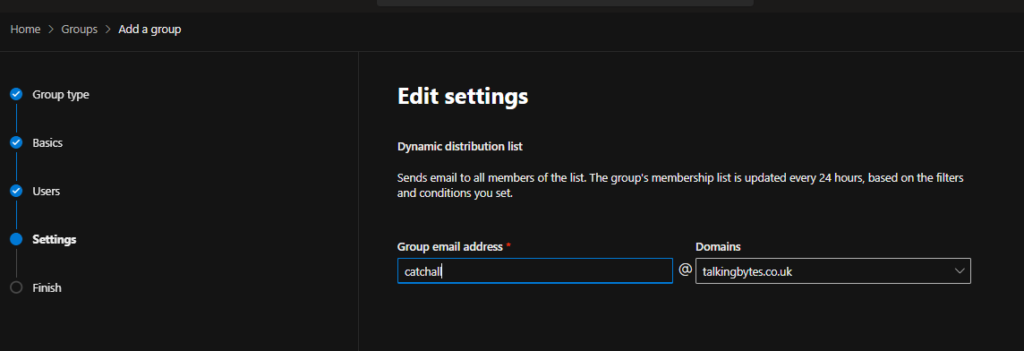
This will need to be a Dynamic Distribution List so that it updates when we create new Users and Groups.

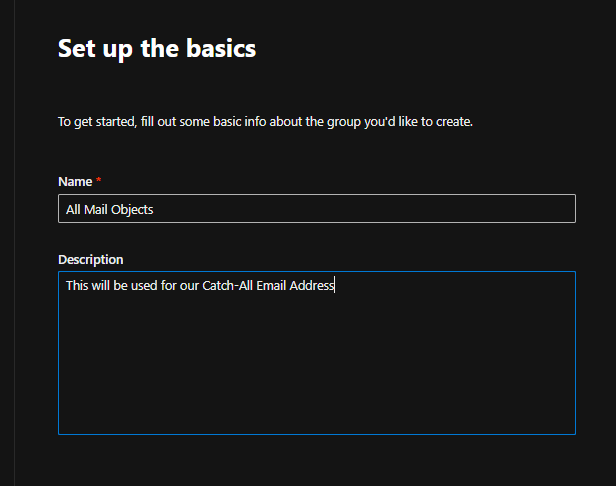
Give the group a name, And a meaningful description.
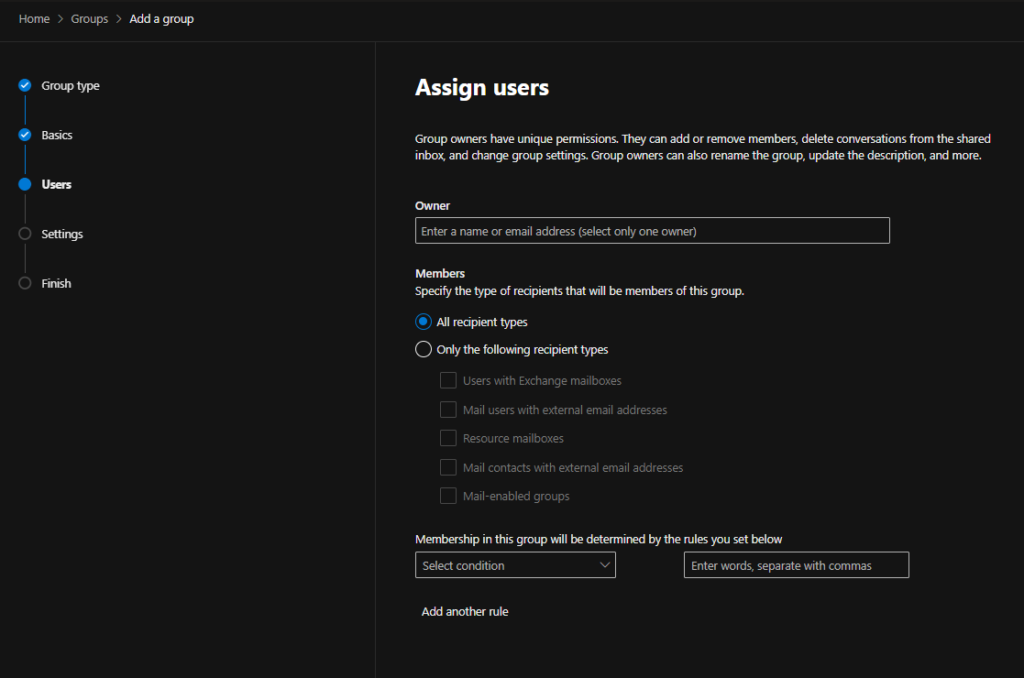
On the next screen we’ll want to ensure this group encompasses anyone with an email address in our tenant.
For these type of groups the Owner field doesn’t need to be populated, but there’s no harm in populating this.
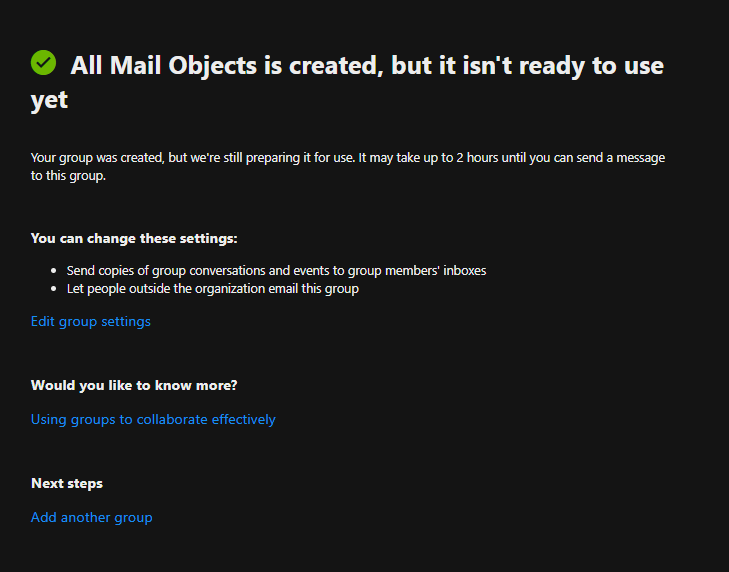
Once you’ve completed this you can click next, Note on the finish screen it may take upto 2 hours for this group to be created. This will have to wait for an update of the global address list which happens on a schedule, and to populate the group.
Creating a Transport Rule
I’m going to presume you’ve already created your mailbox to recieve the catch-all emails into, Therefore lets move into creating the transport rule.
Next we need to create a transport rule to catch messages that come to addresses that aren’t contained in the previously created group.
Start by navigating within the exchange portal to Mail flow, Rules.

Click on Add a rule, Create a new rule.
As a bare minimum the rule needs to include the below.
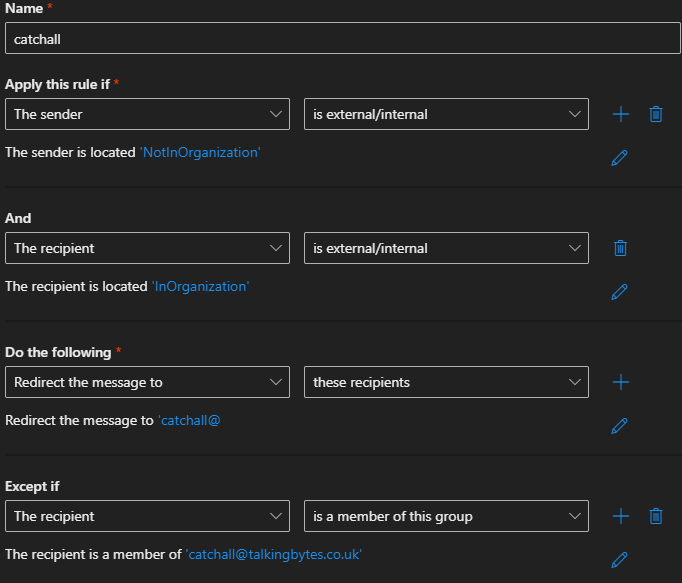
This will apply to all messages not going to a member of the Dynamic Distribution Group.
Whilst we’re on this page we can add in to raise the SCL to 5 (Send the emails to the mailboxes Junk Email (By Default)) or 9 to force it into the Microsoft Quarantine – These can be reviewed and released if required by visiting here
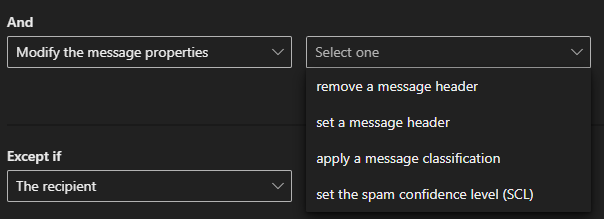
To do this click the + under Do the following and select Modify the message properties, And then Set the Spam Confidence Level (SCL)
We can also Prepend the Subject of the message with text to make it clear it was recieved via a Catch-All rule.

You may also wish to add a banner at the top of the email advising the user that the email was recieved via the Catchall rule and to remain extra vigilent for any links / attachments in the email.

To do this add a rule condition to Apply a disclaimer to the message, Set it to Prepend and enter the below HTML for the enter text. Select Wrap for the fallback option.

<Table border=0 bgcolor="#89cefa">
<tr>
<td>
<H1>Catch-All rule generated this email.</H1>
</td></tr>
</table>
Once the rule has been created, we can move onto the final step.
Change Accepted Domains
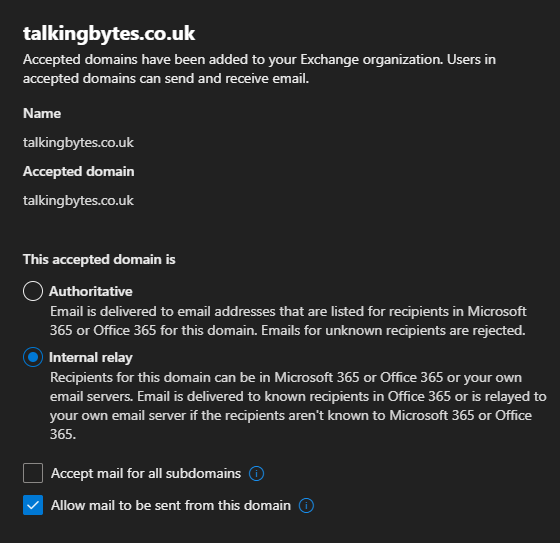
The final step to ensure the transport rule is followed is to change the Domain Type for each of your domains that require a catchall.
By Default Exchange, Exchange Online add new domains in as Authoritive. This does a few things but in short it says “I’m the only Email Server for this domain (Or the final server) in my organisation (In a Hybrid Environment) for this domain, Issue an NDR (Non-Delivery Receipt for email addresses that aren’t in the Global Address List
Clearly this won’t be suitable here so navigate within ECP to Mailflow, Accepted Domains.
Find the domains you need to change this for and change from Authoritive to Internal Relay. Click save once this has been done.
Conclusion
For me, I like having a catchall so I can use different email addresses signing up for new services. I don’t recieve a lot of unwanted emails through it so it’s not a big tradeoff periodically reviewing quarantined emails. I do use Defender for O365 (Microsofts bolt-on Email Security) and so this quarantine is where my “Normal” emails need releasing from also.
It’s worth noting this solution will likely not work without furhter changes if you have Mimecast / Proof-Point or another email filter sat infront of Exchange. Unsure for Proofpoint but Mimecast certainly runs LDAP searches on the Global Address list and by default will drop email addresses that don’t exist.